Planning Production and Presentation
Decay and destruction experimentation


Above are a collection of videos, I wanted to experiment with different methods of decay and destruction. I initially wanted to explore natural methods of decay such as; rotting, burying, mould and exposing clothes to the elements but because of the time limit, with the deadline, I needed to find quicker methods. So instead I tried burning, sanding, tearing, kicking and stamping. I also like the videos all together playing on a loop as I think the repetitive nature makes it chaotic. I could use development pictures with in my final project.
the results from the videos

kicked around on grass

Attached to a drill and twisted
I think this technique could work on a sleeve

Burnt to create holes and ripples in fabric

sanded down using a sanding machine
created a subtle worn effect which I think could work

burnt and twisted
Experimenting with destroying fabric and creating short videos


After the videos from the experimentation I wanted to create a series of videos destroying fabric against a black background instead of multiple ones. After researching Bruce Nauman's projector instillations I wanted to explore evoking emotions through videos. I'm really not happy with how these videos look, I think they look too staged and I want to present something more natural.
Exploring Methods of Decay; bleaching fabrics
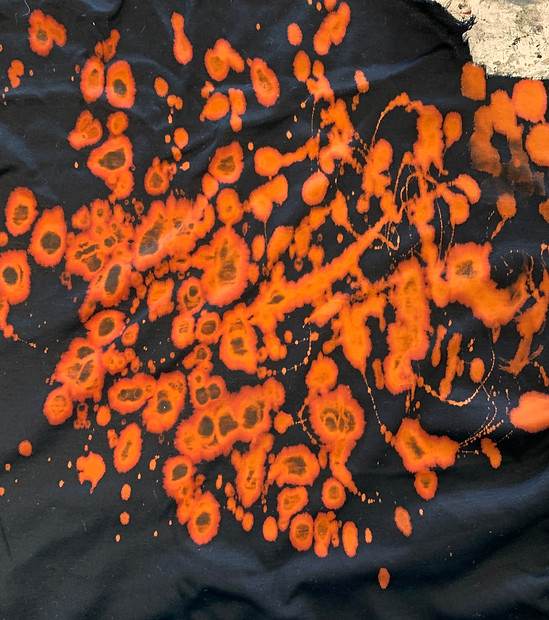


I wanted to explore a quick way of decaying fabric so, I decided to experiment using bleach. I used black fabric and applied the bleach using a paintbrush. I found when I used the paintbrush I could create small dots however when I tried to write words on to the fabric it didn't show up or look very refined. I then tried pouring the bleach directly on to the fabric which created a rusted effect. I also like the bright orange colour that the bleach dyed the fabric. I would like to use bleach on a few garments for my final piece and experiment further with trying to write with it.
Experimenting With The Idea Of Natural Decay


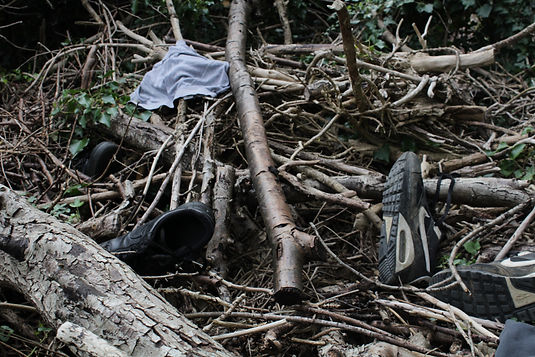
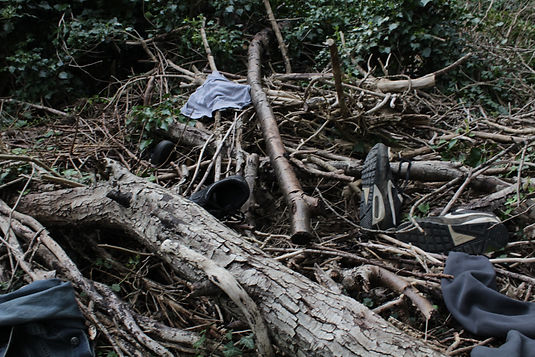

Photographs from the video shoot. I used garments from that had once belonged to other people such as ex- boyfriends, friends and siblings. I wanted to use them as I want them to be a focus of my work, to look back on memories and tell a story through the clothes and how their presented. So the pictures show the aftermath of them being thrown around the woods. I think they overall vibe of the photographs came out very moody and a bit eerie.


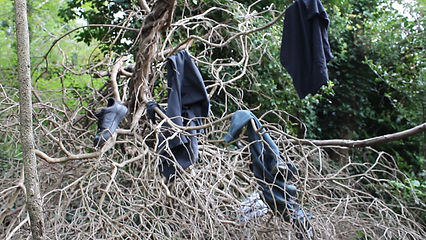
A collection of videos, showing clothes being left to the elements. I explored different methods of hanging and organising the clothes such as; hammering them into a tree and simply throwing them into bushes which can be seen in the videos. I was not happy with the final outcomes as I felt it looked quite bland and lifeless- not representing what I want to present as I want to show more dramatic themes of decay however I do like the collection of videos together. - I could use some of the videos as part of a bigger development style piece
Research- Asking questions on Instagram
After watching the documentary I wanted to explore peoples stories behind garments that they felt sentimental towards. So I asked my followers on Instagram. I found it really interesting to learn what people felt attached to, and I have decided that I would like to incorporate some peoples stories into my work.


Design Idea Notes

Quick notes taken whilst on a walk, I decided that I wanted to use garments in my possession, that I am sentimental towards.
Not only just the decay of a memory but also preserving them
Good and bad memories
Initial Design Ideas


Above are pictures of my own hands. I always wear rings and have collected them over the years from many different places that I have been to. I feel very sentimental towards them as they remind me of the day, place or people I were with when I brought them. I never take them off so they have lived with me for the past four years.


I like the idea of using an old suit jacket to symbolise the theme of marriage. I also like the idea of preserving memories/ creating a sentimental jacket
Jewellery I could use;
Wedding and engagement rings-
Necklaces
Charms
After asking people on Instagram what they feel sentimental towards, I noticed that many people said jewellery, which was something I could also relate to so I have decided that I want to incorporate this into my design.
Quick sketches

sleeve covered in rings
two rings on a chain to symbolise the theme of marriage?

two rings on a chain to symbolise the theme of marriage
layered chains all down the sleeve
individual rings attached in the middle

rings on the body of suit jacket
necklaces/chains going down the sleeve
chain linked on the body

rings on the sleeve intertwined with chains
necklaces/chains draped on the lapels
Development of Jacket


I couldn't decide whether I wanted to put the rings on the breast of the jacket like a military style jacket or on the sleeves, so I pinned them on both. I preferred the rings on the sleeves as I think on the body it would move better. I also like the idea that the rings resemble an individual memory and their worn on the sleeve to present the idea that we wear our heart on our sleeve.


I started by collecting rings from charity shops, I initially wanted to spray paint them all silver as I wanted them to be uniform however once I pinned them all up I liked that each ring was unique so I kept them in their original condition.
This is a video of me attaching the rings to the jacket. I began by pinning the rings in place. I then had to unstitch the lining in the sleeve so I could sew them on. I started using grey thread to attach them but I found it was too visible and looked quite messy so I used invisible thread which is much harder to work with as it is harder to see but the overall result looked much more sleek.
I had to get more rings as I wanted there to be less gaps. So I filled them with a collection of small silver and gold rings
I'm not sure if I want to add chains into the sleeve as well by intertwining them as I think it would look good however it could look too much.
Jumper Design Sketches
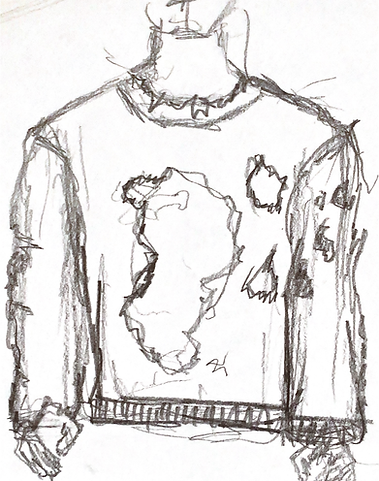

Burnt in the middle
Burnt with print layered underneath
Holes slashed into jumper


Small holes burnt all over the jumper
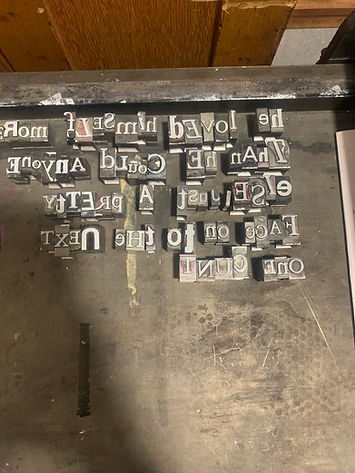
Experimenting with Letterpress

This was my first time experimenting with letterpress. I initially found it difficult to organise the letters backwards and also found that finding the letters was very time consuming as they were not organised into alphabetical order and font.
Written about a past boyfriend, taking inspiration from what friends have said
This print went wrong as I mixed up the B's with the D's


Prints on white calico fabric. I wasn't happy with how these looked as they were not straight


I didn't like the spacing between the lines of this print, so I decided I wanted them closer together
I started to experiment with smaller letters (which took even longer) and then collaging them in with the larger letters to create a messy overall look. I liked how they looked all together however I did not like how the smaller letters looked printed on their own.
This was the print created when I used the smaller letters. I found that when you printed over and over it created quite an interesting scattered effect which I thought looked quite manic which I liked.

This is one of my favourite prints. I like how layered it looks and the different textures of the words as I introduced mesh into the print so it created a pattern over the letters which I think gave it more depth. I want to experiment more with printing on mesh as I think it could look quite effective.
I decided that I wanted to use the blue fabric as it had a suede effect that worked well with the white ink, so I created a pattern taking the measurements from the jumper I want to manipulate and decay. I then cut the pattern into suitable sizes to fit in the press. I liked how it looked overall however it does keep reminding me of a tea towel. I am also not sure how I want to expose the writing yet.


Experimenting with burning fabric, I wanted to see what happened if you layered print underneath burnt fabric as I want to use font with my jumper design
I used the fabric that I burnt and layered it underneath with printed on mesh. Initially I had wanted to use the blue fabric but I really liked how the mesh looked as I think it looked like the letters had been burnt out of the mesh. I am going to use mesh for my final jumper design.


I did a series of prints on to mesh. I played around with the placement of the words, so I tried centring them and then placing them from the left and also the right.
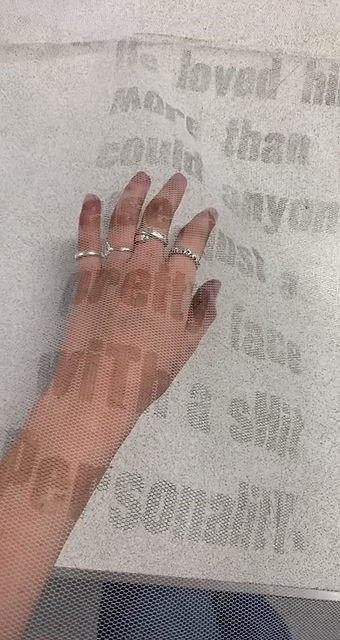
Video of me testing the mesh against skin. I really like how it looks against the skin and how the mesh flows. I would like to try using the mesh in other designs.
Burning The Jumper


Videos of me burning the jumper. I had to be careful not to burn too much of the fabric at the front so I used water spray to control the flame. I found it was very satisfying to pull the fabric .

Final jumper, I stitched the mesh on to the jumper using invisible thread. I found it hard to stitch on as the fabric puckered easily.
Trying on the final look to see what it looked like on the body. I was happy with the final result, when its modelled I think it should be worn with a black t-shirt as it makes the writing more visible.

jumper and jacket photoshoot


